Planning a wedding can feel overwhelming, but creating a wedding vision board can help turn your dream day into reality. A wedding vision board is a visual tool that helps you clarify and communicate your wedding style, preferences, and ideas. It serves as a roadmap that guides you through the planning process, making decisions easier and keeping you focused on your goals. In this post, we’ll walk you through everything you need to know to create your own wedding vision board along with wedding vision board templates to get started.
What is a Wedding Vision Board
A wedding vision board is a collection of images, colors, fabrics, and notes that represent the look and feel you want for your wedding.
At its core, a wedding vision board is a tool for visualization and organization. It allows couples to capture the essence of what they envision for their special day. This could be through magazine cutouts, fabric swatches, photographs, or digital images. The purpose is to create a tangible or digital collage that represents your wedding aspirations.
Comparing this modern tool to traditional wedding planning methods, vision boards offer a more interactive and engaging approach. Traditional methods often involve lengthy discussions and lists, but a vision board provides a visual summary that is easier to understand and share with others, such as planners and vendors.
Wedding Vision Board Templates
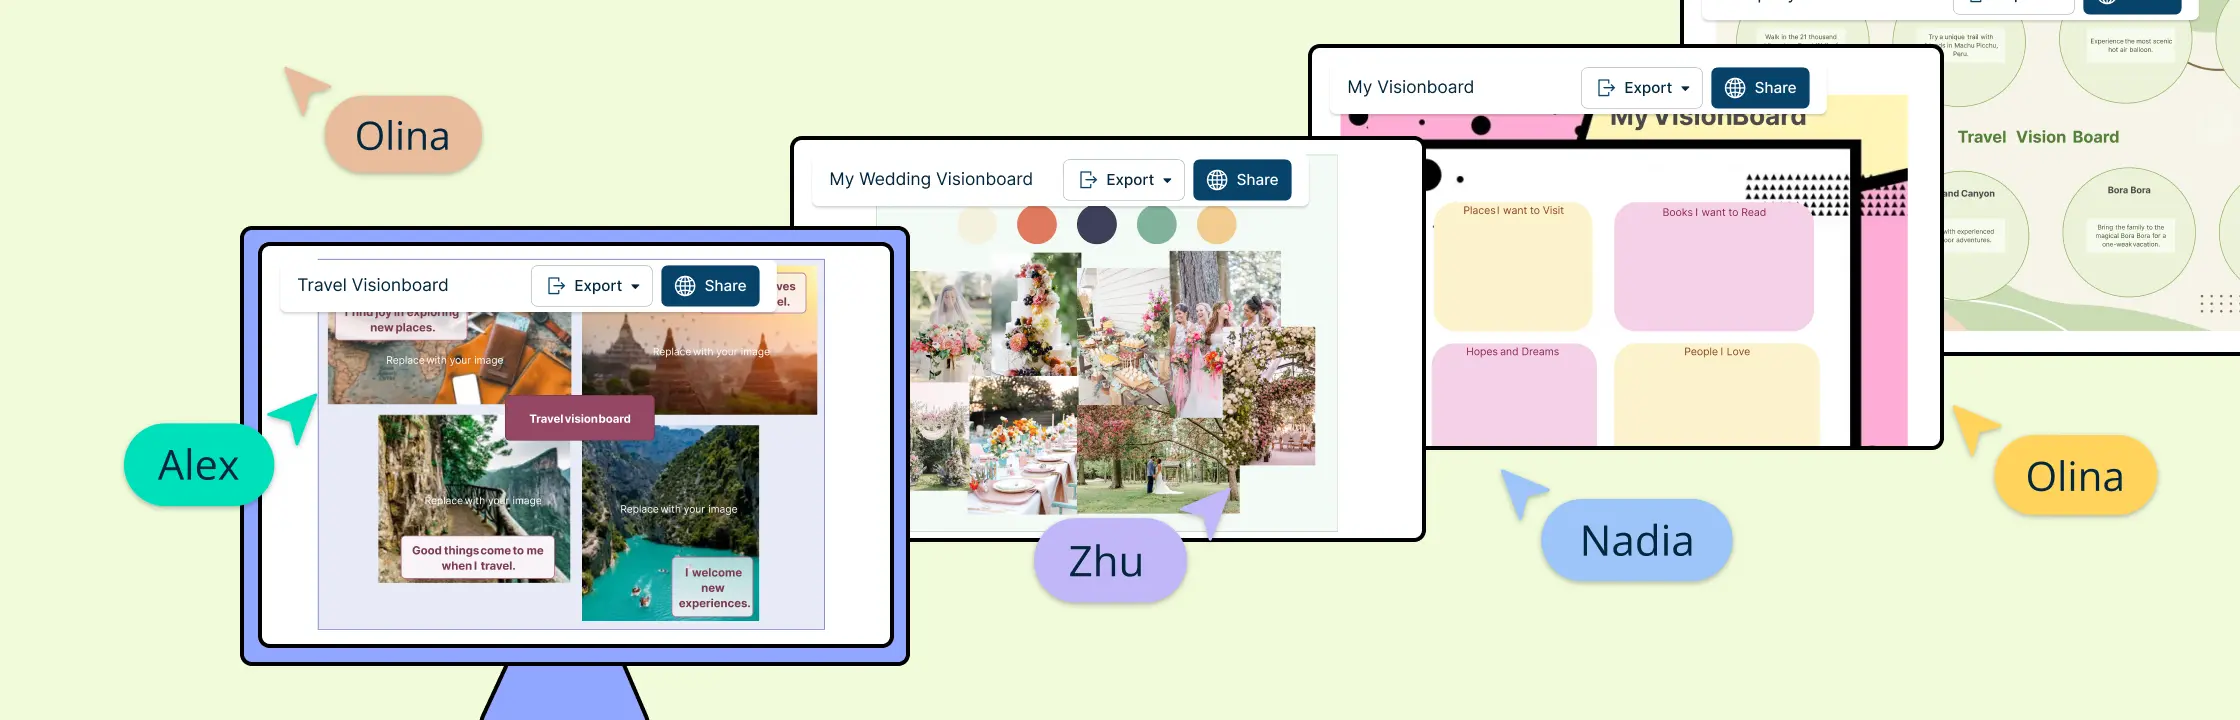
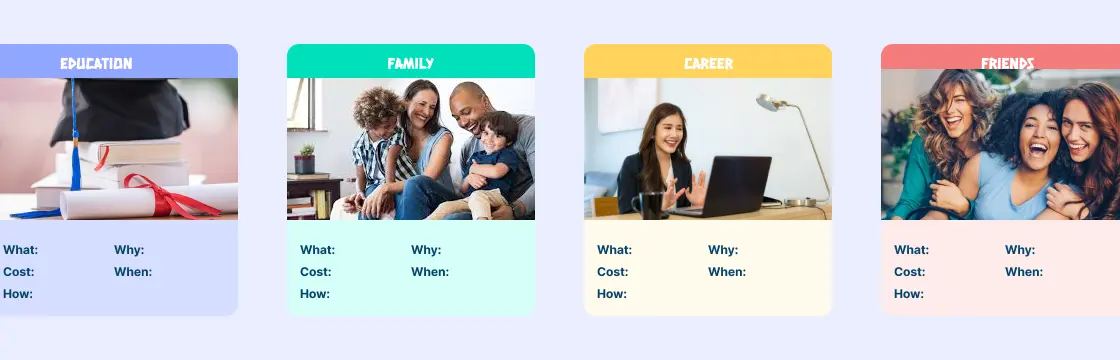
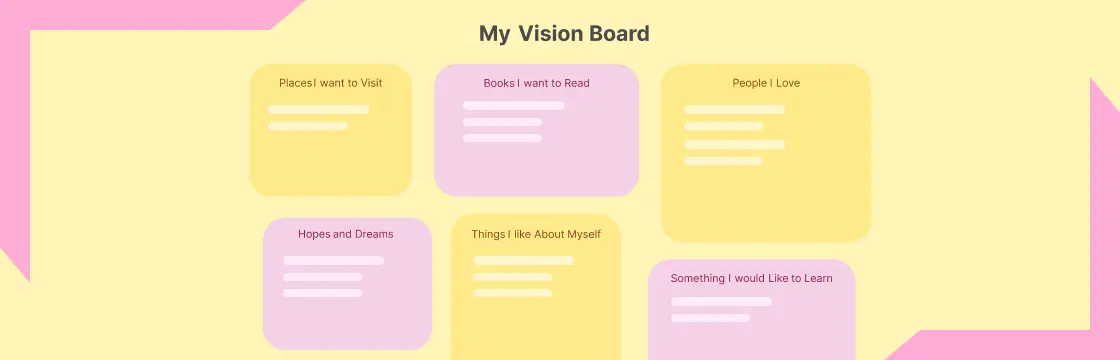
Here are some wedding vision board templates to inspire you and help you get started on planning your dream day.
Wedding vision board template


Wedding vision board

Wedding vision board example

Wedding vision board

Blank wedding vision board

How to Make a Wedding Vision Board
Creating a wedding vision board is a fun and creative way to plan your big day. Follow these steps to craft a vision board that captures your wedding dreams.
Step 1: Gather inspiration
The first step in creating a wedding vision board is gathering inspiration from a variety of sources. Here are some avenues to explore:
- Wedding magazines: Browse through bridal magazines to discover the latest trends, real wedding features, and expert advice. Tear out pages that resonate with you and set them aside for your vision board.
- Pinterest: With its endless array of wedding-related content, Pinterest is a treasure trove of inspiration. Create a dedicated wedding board and start pinning images that capture your desired aesthetic, from wedding dresses to décor ideas.
- Instagram: Follow wedding accounts and hashtags on Instagram to stay up-to-date with the latest wedding trends and inspiration. Save posts that inspire you and incorporate them into your vision board.
- Bridal shows and expos: Attend local bridal shows and expos to see firsthand what various vendors have to offer. Take note of any elements that catch your eye and incorporate them into your vision board.
- Real weddings: Draw inspiration from real weddings featured on blogs, websites, and social media platforms. Pay attention to the details that resonate with you, whether it’s the color palette, floral arrangements, or venue decor.
Step 2: Define your wedding style
Before you start assembling your vision board, take some time to define your wedding style. Here are some key elements to consider:
Venue: Think about the type of venue you want. Is it an outdoor garden, a rustic barn, an elegant ballroom, or a beach setting?
Color scheme: Choose a color palette that reflects your style and complements your venue and season.
Floral arrangements: Decide on the types of flowers and arrangements you love. Do you prefer wildflowers, roses, or succulents?
Attire: Consider the style of wedding attire for you and your bridal party. Is it traditional, bohemian, or modern?
Décor: Think about the decor elements that will create the atmosphere you desire. Do you envision minimalist, vintage, or glamorous decor?
Questionnaire:
- What season are you getting married in?
- Do you prefer a large celebration or an intimate gathering?
- What are your favorite colors?
- What atmosphere do you want to create?
Examples:
Rustic: Barn venue, mason jar centerpieces, wildflowers.
Vintage: Lace dress, antique décor, pastel color palette.
Modern: Sleek lines, monochromatic colors, minimal décor.
Step 3: Choose your tools and materials
Decide whether you want to create a physical or digital vision board. Here’s what you’ll need for each option:
Digital vision board:
Creately: Creately is an easy-to-use visual diagramming and collaboration tool that offers templates and design features.
Pinterest: Ideal for organizing online inspiration and creating mood boards.
Physical vision board:
Corkboard or poster board: A large board to serve as the base for your vision board.
Scissors, glue, and tape: Basic crafting supplies to cut and attach images.
Magazines and printed images: Sources of visual inspiration.
Fabric swatches and color samples: Add texture and color to your board.
Step 4: Create your vision board
With your wedding style defined and your inspiration gathered, it’s time to create your vision board. Whether you’re opting for a digital or physical vision board, follow these steps to bring your vision to life:
Digital vision board:
- Start with a blank canvas: Open Creately and open a blank canvas and name it. Choose a premade layout that suits your preferences or drag and drop shapes or import images on to the canvas to start one from scratch.
- Upload and arrange images: Upload the images you’ve gathered and arrange them on your digital board in a visually pleasing layout. You can also easily embed any documents, sheets, videos, and images with in-app previews easily.
- Add text or notes: Include text or notes (with sticky notes or the per item notes panel) to provide context for each image and explain why it resonates with you.
- Share and collaborate: Add collaborators and share or work with them to further develop your wedding vision board. Capture feedback with comments and use emojis or run voting sessions to prioritize on favorite ideas.
Physical vision board
- Set up the board: Lay out your corkboard or poster board in a well-lit, spacious area where you can work comfortably.
- Cut and arrange images: Use scissors to cut out the images you’ve collected and arrange them on your board in a collage-style layout.
- Attach fabric swatches and color samples: Incorporate fabric swatches and color samples into your vision board to represent your chosen color palette and textures.
- Add personal touches: Include personal touches like handwritten notes, mementos, or quotes that resonate with you and your partner.
Step 5: Refine your vision
Step back and review your vision board. Make sure that it accurately reflects your vision and makes a cohesive statement. Share your vision board with trusted friends, family members, or your wedding planner for feedback and suggestions. Based on feedback and your evolving ideas, make any necessary changes to your vision board.
Step 6: Use Your vision board
Bring your vision board to meetings with vendors to help them understand your style and preferences. Refer to your vision board when making decisions about every aspect of your wedding to ensure consistency. Use your vision board as a reference point throughout the planning process to stay on track and focused.
Why Create a Wedding Vision Board?
1. Clarifies your vision
A wedding vision board helps you and your partner pinpoint your exact preferences and ideas. It visually represents your overall theme and specific details like colors, flowers, and attire, ensuring cohesive decisions throughout the planning process.
2. Boosts communication
A vision board is a valuable communication tool. It effectively conveys your ideas to vendors, wedding planners, and family members, ensuring everyone involved understands and shares your vision.
3. Keeps you organized
Planning a wedding involves juggling many details and decisions. A vision board acts as an organizational anchor, helping you track your ideas and preferences and ensuring all wedding elements align with your desired aesthetic.
4. Saves time and reduces stress
With a clear vision in place, decision-making becomes straightforward. Quickly identify what fits your vision, saving time and reducing stress, making the planning process more enjoyable and less overwhelming.
5. Inspires creativity
Creating a vision board for a wedding is a fun, creative exercise. It allows you to explore different styles, themes, and trends, inspiring new ideas and unique elements that will make your wedding special.
6. Ensures cohesiveness
A vision board helps ensure every aspect of your wedding, from invitations to reception décor, works together harmoniously. By maintaining a consistent theme and color palette, you create a seamless and beautiful overall experience for your guests.
7. Adapts to changes
As your planning progresses, your ideas and preferences might evolve. A vision board is flexible and can be updated to reflect these changes, ensuring your wedding remains a true reflection of your current tastes and desires.
What Should be Included in a Wedding Vision Board?
Creating a comprehensive wedding vision board involves incorporating various elements that collectively represent your ideal wedding day. Here’s a detailed list of what to include:
1. Overall theme and style
Mood images: Pictures that capture the overall vibe or atmosphere you want, such as rustic, vintage, bohemian, modern, or elegant.
Inspiration photos: Images from other weddings that reflect your desired theme and style.
Typefaces, fonts, logos: Typefaces and fonts that match your theme (e.g., handwritten for rustic, sans-serif for modern). Design a unique wedding logo or monogram that can be used on invitations, signage, and other printed materials, ensuring it aligns with your overall aesthetic.
2. Color palette
Color swatches: Samples of your chosen colors to set the tone for the entire wedding.
Color combinations: Visual examples of how different colors look together.
3. Venue and setting
Venue photos: Pictures of potential venues or venues that inspire you.
Setting ideas: Concepts for outdoor vs. indoor settings, beach, garden, barn, or ballroom.
Location ideas: Destination weddings in tropical islands or European castles, local venues for convenience, and unique locations like museums or botanical gardens.
4. Attire
Bridal gown: Images of wedding dresses that you love.
Groom’s attire: Ideas for the groom’s suit or tuxedo.
Bridesmaids’ dresses and groomsmen’s attire: Styles and colors for the bridal party.
Accessories: Shoes, jewelry, and other accessories.
5. Floral arrangements
Bouquets: Styles and types of flowers for the bridal bouquet and bridesmaids’ bouquets.
Centerpieces: Ideas for table centerpieces.
Decorative flowers: Floral arrangements for the ceremony and reception.
6. Décor and details
Table settings: Ideas for place settings, table linens, and tableware.
Ceremony décor: Concepts for aisle decorations, altars, and backdrops.
Reception décor: Ideas for lighting, signage, and other decorative elements.
7. Stationery
Invitations: Styles and designs for wedding invitations.
Save-the-dates: Ideas for save-the-date cards.
Menus and programs: Designs for wedding day programs and menus.
8. Cake and desserts
Cake designs: Images of wedding cakes that match your theme and color scheme.
Dessert tables: Ideas for dessert displays and other sweet treats.
9. Entertainment and activities
Music and bands: Photos and ideas for bands, DJs, or musicians.
Activities: Concepts for guest activities, photo booths, or unique entertainment.
10. Personal touches
Family traditions: Elements that incorporate family traditions or cultural aspects.
DIY projects: Personal projects or handmade items you plan to include.
Tips for Creating an Effective Wedding Vision Board
Here are some tips to help you create an effective and inspiring vision board:
1. Start Early
Begin your vision board as soon as you start planning your wedding. This gives you ample time to explore different ideas and refine your vision.
2. Gather enough inspiration
- Use a variety of sources for inspiration, such as wedding magazines, Pinterest, Instagram, wedding blogs, and real wedding stories.
- Create separate categories or folders for different aspects of your wedding (e.g., attire, décor, flowers, venues).
3. Define your vision
- Decide on the overall theme and style of your wedding, whether it’s rustic, vintage, modern, or bohemian.
- Choose a color palette that reflects your style and complements your chosen theme and venue.
4. Use both digital and physical boards
Platforms like Creately and Pinterest are excellent for creating digital vision boards. They allow you to easily organize and rearrange your ideas. And if you prefer a tangible approach, use a corkboard or poster board to create a physical vision board. Include fabric swatches, printed images, and color samples.
5. Be selective
Select images and items that truly resonate with you. Avoid overcrowding your board with too many options, which can make it overwhelming and less cohesive. Ensure each element on your board has a clear purpose and aligns with your overall vision.
6. Organize your board
Group similar elements together, such as attire, décor, flowers, and stationery. This helps create a clear and organized board. Arrange your board in a way that reflects the timeline of your wedding day, from ceremony to reception.
7. Include personal touches
- Add personal touches that reflect your story as a couple, such as family traditions, favorite quotes, or meaningful symbols.
- If you plan to include DIY projects, showcase examples and instructions to keep track of your ideas.
8. Seek feedback
Show your vision board to your partner, family, or close friends for feedback. They might offer valuable insights or ideas you hadn’t considered. Share your vision board with your vendors to ensure they understand your style and preferences.
9. Stay flexible
As your planning progresses, your ideas may evolve. Be open to updating and refining your vision board to reflect new inspirations or changes in your preferences. Allow your board to adapt to any logistical or budgetary constraints without losing the essence of your vision.
10. Keep it accessible
Keep your vision board in a place where you can easily access and review it. If it’s digital, ensure it’s accessible on your devices. If it’s physical, place it in your planning space. Regularly review your vision board to stay on track and ensure all planning decisions align with your vision.
Creating a wedding vision board is a fun and productive way to start your wedding planning journey. It helps you and your partner align on your vision, makes communication with vendors easier, and keeps your planning process organized. We encourage you to start your own vision board today and share your progress with us in the comments or on social media. Happy planning!